If you love coffee but want a convenient way to preserve it without sacrificing its rich aroma and flavor, freeze-dried coffee is the way to go. Think of it as creating your own premium instant coffee, but with better control over the quality and taste. Whether you’re a homestead enthusiast or a home barista, learning how to make freeze-dried coffee can elevate your coffee game to a whole new level.
This guide will walk you through everything you need to know, from understanding freeze-dried coffee to the tools, steps, and best practices for making it at home. By the end, you’ll have the confidence to turn your favorite brews into long-lasting, ready-to-enjoy craft coffee.
Why Freeze-Dried Coffee Stands Out
Freeze-dried coffee is a favorite among coffee enthusiasts for a reason. Unlike traditional instant coffee, which often sacrifices flavor during production, freeze-drying preserves the nuanced notes and rich character of your coffee. It’s an excellent way to keep your favorite beans fresh for long-term storage while ensuring you have an easy-to-use option for quick brewing.
For homesteaders, it’s a practical solution to minimize waste and store coffee for months (or even years). And for home baristas, it’s a creative and rewarding way to enjoy your custom brews wherever life takes you.
Is Freeze-Dried Coffee Just Instant Coffee?
Not quite. Freeze-dried coffee is often mistaken for instant coffee, but the two are made using different methods. Traditional instant coffee is produced through spray-drying, which involves high heat and usually results in a loss of flavor and aroma. Freeze-dried coffee, on the other hand, is made by rapidly freezing brewed coffee and removing the water through sublimation (more on that later). This process helps retain the coffee’s natural oils and complex flavors, creating a noticeably better-tasting result.
Creative Uses for Freeze-Dried Coffee
Freeze-dried coffee is versatile beyond just being a quick brew option. Here are some creative ways to use it:
- Effortless Morning Cups: Simply rehydrate it with hot water for a flavorful cup of coffee in seconds.
- Camping or Travel Companion: Lightweight and portable, freeze-dried coffee is ideal for trips where space and equipment are limited.
- Baking Ingredient: Boost the flavor of cakes, cookies, or frosting with freeze-dried coffee—just dissolve it in water or mix it straight into your batter.
- Tiramisu or Desserts: Use it to create a bold espresso flavor for decadent desserts.
- Cocktails: Stir it into espresso martinis for an extra layer of depth.
Essential Tools and Equipment
To make freeze-dried coffee at home, you’ll need a few key tools (don’t worry, it’s not as intimidating as it sounds):
- Freeze-Dryer (essential): While freeze-drying coffee is possible without specialized equipment, using a home freeze-dryer like those by Harvest Right makes it significantly easier.
- Vacuum Pump (for DIY setups): Necessary if you’re building your own freeze-drying system.
- Freezer-Safe Trays: For evenly spreading out your coffee before the freeze-drying process.
- Airtight Storage Containers: To store your freeze-dried coffee once it’s ready.
Ingredients for Freeze-Drying Coffee
You’ll only need one main ingredient—coffee. But the quality of your beans or grounds makes all the difference. Choose freshly brewed coffee made from premium beans that match your taste preferences.
For the best results:
- Use medium to dark roast coffee for a bold flavor.
- Brew it as strong as you like, depending on how you plan to use the freeze-dried coffee later.
Step-by-Step Guide to Freeze-Drying Coffee
Now, for the fun part—making your very own freeze-dried coffee! Follow these steps carefully for the best results.
Step 1: Brew the Coffee
Start by brewing a strong batch of coffee. The stronger the brew, the more concentrated the flavor will be in your freeze-dried version.
Step 2: Freeze the Coffee
Pour the brewed coffee into shallow freezer-safe trays. Aim for a thin, even layer so it freezes thoroughly. Place the trays in your freezer, setting the temperature as low as possible. Let the coffee freeze completely (overnight is best).
Step 3: Prepare for Freeze-Drying
Once frozen solid, place the trays into your freeze-dryer or DIY freeze-drying setup. If you’re using a DIY method, ensure your vacuum pump is properly connected and your workspace is ready for safe operation.
Step 4: Sublimation
During this stage, the freeze-dryer removes moisture from the frozen coffee through sublimation—a process where the ice transitions directly into vapor without melting. This can take anywhere from 12 to 24 hours, depending on your setup and the batch size.
Step 5: Check for Dryness
Once the cycle is complete, check the coffee for dryness. The freeze-dried coffee should crumble easily and have almost no moisture content. This ensures it’s ready for long-term storage.
Signs Your Freeze-Dried Coffee is Ready
Wondering if your freeze-dried coffee is good to go? Here are a few signs:
- It’s completely dry to the touch and crumbles easily.
- There’s no residual moisture or stickiness.
- The freeze-dried coffee dissolves quickly when added to hot water.
If you’re unsure, it’s better to run another cycle to ensure all the moisture is gone—this is key to extending the coffee’s shelf life.
How to Rehydrate Freeze-Dried Coffee Properly
Rehydrating freeze-dried coffee is as easy as it gets:
- Add 1–2 teaspoons of freeze-dried coffee to a cup.
- Pour hot water over it.
- Give it a quick stir, and your coffee is ready to sip.
For cold coffee, you can mix the freeze-dried coffee with cold water and ice cubes. Stir or shake well to dissolve completely.
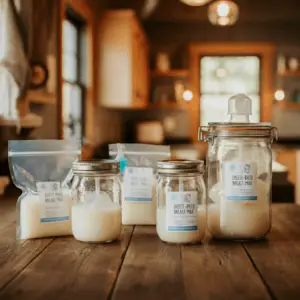
Best Practices for Storing Freeze-Dried Coffee
To keep your freeze-dried coffee fresh for as long as possible, follow these storage tips:
- Use airtight containers or vacuum-seal bags to prevent exposure to air and moisture.
- Store in a cool, dark place away from sunlight.
- Avoid storing in humid environments, as moisture can compromise the coffee’s quality.
Properly stored freeze-dried coffee can last up to 10 years, making it a fantastic option for long-term use.
FAQ
Q: Do I need a professional freeze-dryer to make freeze-dried coffee?
A: While a dedicated freeze-dryer is the easiest option, DIY setups using a standard freezer and vacuum pump are possible. However, they may not achieve professional-grade results.
Q: What’s the difference between freeze-dried and spray-dried coffee?
A: Freeze-dried coffee uses sublimation to remove water, preserving more flavor, while spray-dried coffee involves high heat, which often alters the taste.
Q: Can I use flavored coffee for freeze-drying?
A: Yes, but keep in mind that flavored syrups or additives may impact the drying process and shelf life.
Q: How much freeze-dried coffee should I add per cup?
A: Start with 1–2 teaspoons, then adjust to taste depending on how strong you like it.
Your Homemade Freeze-Dried Coffee Awaits
With a little effort and the right tools, you can create freeze-dried coffee at home that rivals (or surpasses!) store-bought options. It’s a practical, creative, and rewarding way to preserve your favorite brews while highlighting their unique flavors. By following these steps and tips, you’ll have a ready supply of exceptional coffee to enjoy anytime, anywhere.
Happy brewing!