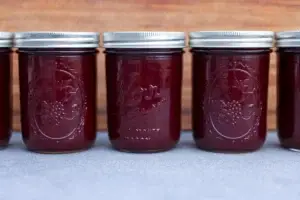
If you’re looking to preserve the freshness of your farm-grown green beans, canning is the ultimate solution. Properly canned green beans retain their crisp texture, vibrant flavor, and essential nutrients, making them a pantry staple for every home cook. Whether you’re a seasoned homesteader or a beginner in food preservation, this guide will take you through the process of pressure canning green beans step by step.
By the end, you’ll know everything you need to confidently pressure can green beans, including the tools required, detailed instructions, common mistakes to avoid, and tips for long-lasting freshness.
Why Pressure Canning Green Beans Is the Best Method
Green beans are a low-acid food, which means they require pressure canning to ensure safety. Using a pressure canner prevents harmful bacteria like Clostridium botulinum from contaminating your food.
Here are the benefits of pressure canning:
- Safety First: Proper pressure canning eliminates bacteria and ensures a perfect seal.
- Nutrient Retention: This method locks in vitamins and minerals, preserving the health benefits of green beans.
- Superior Flavor: Your canned beans will taste garden-fresh even months later.
Let’s dive into what you’ll need to get started.

Essential Tools and Ingredients
Having the right tools and ingredients at your fingertips will make the process seamless and enjoyable.
Ingredients:
- Fresh green beans (approximately 2 pounds per quart-sized jar)
- Boiling water
- Pickling salt (optional, for flavor)
Tools:
- Pressure canner (not a pressure cooker)
- Mason jars with lids and bands
- Jar lifter and funnel
- Large pot for boiling water
- Clean towels for handling hot jars
Step-by-Step Guide: How to Pressure Can Green Beans
Step 1: Prepare Your Green Beans
- Harvest Fresh Beans: Use tender, firm, and blemish-free green beans for the best results.
- Wash Thoroughly: Rinse the beans under running water to remove dirt or debris.
- Trim and Cut: Snap off the ends of the beans and cut them into pieces about 1-2 inches long.
Step 2: Sterilize and Prepare Your Jars
- Wash and Sterilize: Clean jars, lids, and bands with hot soapy water. Sterilize by boiling in water for 10 minutes.
- Keep Warm: Leave jars in hot water until you’re ready to fill them. This prevents cracking when hot liquid is added.
Step 3: Pack the Jars
- Choose Your Packing Method:
- Raw Pack: Fill jars with raw green beans, leaving 1 inch of headspace.
- Hot Pack: Blanch beans in boiling water for 5 minutes, then pack them into jars while still hot.
- Add Optional Salt: For flavor, add ½ teaspoon of pickling salt per pint or 1 teaspoon per quart.
- Add Boiling Water: Pour boiling water into jars, ensuring beans are fully submerged. Maintain 1 inch of headspace.
Step 4: Seal the Jars
- Wipe jar rims with a clean towel to remove residue.
- Place lids on top and secure bands until fingertip-tight.
Step 5: Pressure Can the Green Beans
- Prepare the Pressure Canner: Add water per manufacturer’s instructions. Place jars in the canner using a jar lifter.
- Build Pressure: Heat the canner until steam escapes steadily for 10 minutes, then close the vent.
- Process Jars: Adjust to 10 PSI (pounds per square inch) and process:
- Pint Jars: 20 minutes
- Quart Jars: 25 minutes
- Altitude Adjustments: Increase pressure for altitudes above 1,000 feet (refer to your canner’s manual).
Step 6: Cool and Store
- Allow the pressure canner to cool and depressurize naturally. Do not force it open.
- Check seals: Press on the jar lids. If they don’t pop back, the seal is secure.
- Label jars with the date and store them in a cool, dark place. Properly canned green beans can last up to 1 year.
FAQs About Canning Green Beans
Can I use a regular pressure cooker?
No, only use a pressure canner specifically designed for canning low-acid foods.
What should I do if a jar doesn’t seal?
Refrigerate and consume within a few days or reprocess with a new lid.
How can I adjust for higher altitudes?
Increase the pressure per your canner’s manual (e.g., 15 PSI above 1,000 feet).
Common Mistakes to Avoid
- Skipping Sterilization: Always sterilize jars to prevent contamination.
- Overtightening Lids: Bands should be snug but not too tight to allow air to escape during processing.
- Incorrect Headspace: Leave 1 inch to prevent overflow and failed seals.
Why Canning Green Beans Is Worth It
Canning your own green beans is a rewarding way to enjoy garden-fresh produce year-round. It saves money, reduces food waste, and gives you control over what goes into your pantry. Plus, there’s nothing quite like opening a jar of perfectly preserved green beans and tasting the freshness of summer any time of the year.
If you’re interested in expanding your canning skills, check out our guides on How to Can Carrots at Home and How to Can Jellied Cranberry Sauce. These articles will help you create a diverse, flavorful pantry stocked with home-preserved produce and condiments!
Start Your Canning Journey Today
With this guide, you’re ready to start pressure canning green beans like a pro. Gather your tools, prep your beans, and let your pressure canner work its magic. Don’t forget to share this guide with fellow home cooks and gardening enthusiasts who want to enjoy the art of food preservation!