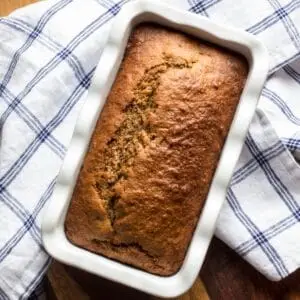
Jellied cranberry sauce is a staple at most holiday tables, bringing a tangy, sweet balance to hearty meals. But did you know you can make your own canned cranberry jelly at home? Not only is it fresher and tastier than store-bought versions, but it’s also a rewarding way to preserve seasonal ingredients. Whether you’re a home cook, a homesteader, or a food enthusiast looking to elevate holiday traditions, this guide will walk you step-by-step through homemade canning of cranberry sauce jellied to perfection.
By the end of this article, you’ll be equipped with everything you need to make canned cranberry jelly that looks beautiful, tastes incredible, and lasts for months.
Why Make and Can Your Own Jellied Cranberry Sauce?
Before we jump into the canning process, let’s talk about why anyone would bother making jellied cranberry sauce at home when it’s so easy to grab a can off the shelf.
1. Superior Flavor: Homemade cranberry sauce jellied from fresh fruit tastes brighter, fresher, and more vibrant than store-bought versions. You can also control the sweetness or add subtle flavors like orange zest or cinnamon.
2. Customization: Get creative! Want your cranberry sauce less sweet or with a hint of cloves? You’re in charge of the recipe.
3. Self-Sufficiency: Homemade canning is a perfect project for homesteaders and anyone looking to preserve seasonal fruits for future meals.
4. No Additives: Store-bought jellied cranberry sauce often contains preservatives and artificial coloring. Homemade versions are made with simple, wholesome ingredients.
What You’ll Need to Get Started
To create your homemade canned cranberry jelly, you’ll need some equipment and ingredients on hand. Don’t worry—it’s straightforward, and once you gather these items, you can use them for all of your home canning projects.
Equipment:
- Canning Jars: Ball or Mason jars are perfect. Use half-pint jars for gifting or pint jars for storage.
- Lids and Rings: Always use new lids to ensure a safe seal.
- Large Pot or Canning Kettle: For water bath canning.
- Fine Mesh Strainer or Food Mill: Essential for achieving that smooth, jellied texture.
- Wide-Mouth Funnel: Makes it easy to transfer sauce into jars without spilling.
- Jar Lifter and Tongs: For safely handling hot jars.
- Candy Thermometer (Optional): To check that your sauce reaches the proper gel stage.
Ingredients:
- 4 cups fresh or frozen cranberries (about 1 lb)
- 2 cups water
- 1½ – 2 cups granulated sugar (adjust to taste)
Step 1: Preparing the Cranberry Sauce
Start by making your cranberry sauce in its purest form. This is what will eventually become your beautifully smooth, jellied cranberry sauce.
- Wash and Sort Cranberries: Rinse the cranberries thoroughly under cold water. Remove any stems or damaged berries.
- Cook the Cranberries: Combine the cranberries and water in a large pot. Bring the mixture to a boil, then reduce to a simmer for about 10 minutes, until the berries pop and soften.
- Strain the Mixture: For smooth jellied cranberry sauce, pass the mixture through a fine mesh strainer or food mill to remove the skins and seeds. Discard the solids.
- Add Sugar: Return the strained liquid to the pot and stir in the sugar. Heat gently until the sugar is fully dissolved. For a firmer jelly, cook until the mixture reaches 220°F on a candy thermometer.
At this stage, you have a silky cranberry jelly that’s ready to be canned.
Step 2: Preparing Jars for Canning
To safely preserve your cranberry sauce jellied, it’s essential to sterilize your jars and make sure they seal properly.
- Sterilize Your Equipment: Wash your jars, rings, and lids in hot soapy water. Sterilize them by boiling in a large pot of water for 10 minutes. Leave them submerged until ready to use.
- Prepare Your Water Bath: Fill a large canning pot or kettle with enough water to fully submerge your jars by at least 1 inch. Bring to a gentle boil while you work on filling the jars.
Step 3: Filling and Sealing the Jars
Now comes the exciting part—transforming your cranberry jelly into shelf-stable goods.
- Fill the Jars: Using a wide-mouth funnel, pour the hot cranberry jelly into the sterilized jars, leaving about ¼ inch of headspace (the space between the jelly and the lid).
- Remove Air Bubbles: Gently run a non-metallic spatula or chopstick around the inside of the jar to release any trapped air bubbles.
- Wipe the Rims: Use a clean, damp cloth to wipe the jar rims to ensure a good seal.
- Apply Lids and Rings: Place the lid on top and screw on the ring until it’s fingertip tight.
Step 4: Water Bath Canning
Water bath canning ensures your canned cranberry jelly stays safe to eat for months.
- Can the Jars: Lower your filled jars into the boiling water bath with a jar lifter. Be sure the water covers the jars by at least 1 inch.
- Process the Jars: Boil for 10–15 minutes (adjust for altitude if necessary).
- Cool and Check the Seals: Carefully remove jars with a jar lifter and place them on a towel. Allow them to cool for 12–24 hours. Once cool, check that the lids have sealed by pressing the center of the lid—it should not flex up or down.
Step 5: Label and Store Your Jars
Congratulations! You now have beautifully canned cranberry jelly that you can store or gift.
- Label Your Jars: Use labels or markers to date your jars. Homemade jellied cranberry sauce can last 12 months in a cool, dark pantry.
- Consume Responsibly: Once opened, refrigerate and use within 2–3 weeks.
Pro Tips for Perfect Jellied Cranberry Sauce
- Experiment with Flavors: Try adding orange juice, zest, or spices like cinnamon and cloves for a unique twist.
- Test for Gel Stage: If you don’t have a thermometer, use the spoon test. Dip a cold spoon into the mixture; if the jelly drips off in thick sheets, it’s ready.
- Use Fresh Cranberries: Whenever possible, opt for fresh, firm cranberries for the best flavor and color.
Elevate Your Holiday or Everyday Table
There’s nothing more satisfying than popping open a jar of your own homemade cranberry jelly. Perfect for holiday spreads, as a glaze for meats, or even stirred into yogurt, homemade canned cranberry jelly offers a world of possibilities.
Now that you know how to master the art of making and canning jellied cranberry sauce, all you need is a little time in the kitchen to get started. You’ll be proud to share this homemade treat with friends and family—or enjoy it all for yourself!
Want more tips on preserving seasonal fruits and veggies? Subscribe to our newsletter for expert advice and recipes.