Successfully growing vegetables often hinges on one critical step transplanting vegetable plugs. Done right, this process sets the stage for thriving plants and bountiful harvests. Beginners and seasoned gardeners alike face challenges, from transplant shock to root disturbance. But with proper techniques, your garden can flourish.
This guide dives into everything you need to know about transplanting vegetable plugs. From preparing your garden bed to avoiding common pitfalls, you’ll walk away ready to give your seedlings the best possible start.
What Are Vegetable Plugs and Why Transplant Them
Vegetable plugs are young plants grown in compact, individual containers. These plugs typically have a robust root system, making them ideal candidates for transplanting into larger spaces, like garden beds or bigger pots. By growing vegetables as plugs, gardeners can control early growth conditions, reducing vulnerabilities like pests and frost damage. However, for your plants to thrive after transplanting, proper techniques are essential.
Benefits of Transplanting Vegetable Plugs
- Stronger Plants: Starting vegetables as plugs strengthens early root and stem development.
- Season Extension: Transplanting extends active growing seasons across different climates.
- Optimized Space: Gardeners can prioritize space by starting seeds indoors and transplanting them only when outdoor conditions are optimal.
- Better Yield: Handling delicate seedlings carefully ensures a smoother transition, subsequently improving plant yield.
The Risks of Getting It Wrong
Without proper care, vegetable plugs may suffer from transplant shock, a condition where plants struggle to adapt, leading to stunted growth or even death. Key contributors to this are root damage, temperature changes, and inadequate watering. Fortunately, these risks can be mitigated with a few strategic steps.
Steps to Transplant Vegetable Plugs Like a Pro
Prepare Your Garden Bed
Before transplanting, ensure your garden bed is clean, well-prepared, and nutrient-rich.
- Loosen the Soil: Use a rake or hoe to break up compacted soil, making it easier for plants to establish roots.
- Test Soil Moisture: The soil should be lightly damp but not waterlogged this ensures immediate hydration for roots.
- Add Nutrients: Enrich your garden bed with organic compost or fertilizers to provide essential nutrients.
Harden Off Your Seedlings
Seedlings need time to adjust to outdoor conditions before transplanting. This process is called “hardening off.”
- Gradual Outdoor Exposure: Expose your plugs to direct sunlight and outdoor temperatures for 2-3 hours daily, gradually increasing the duration.
- Timing: Start the hardening-off process at least a week before transplanting.
- Shade Support: During warmer days, provide temporary shade to prevent stress.
Handle Plugs with Care
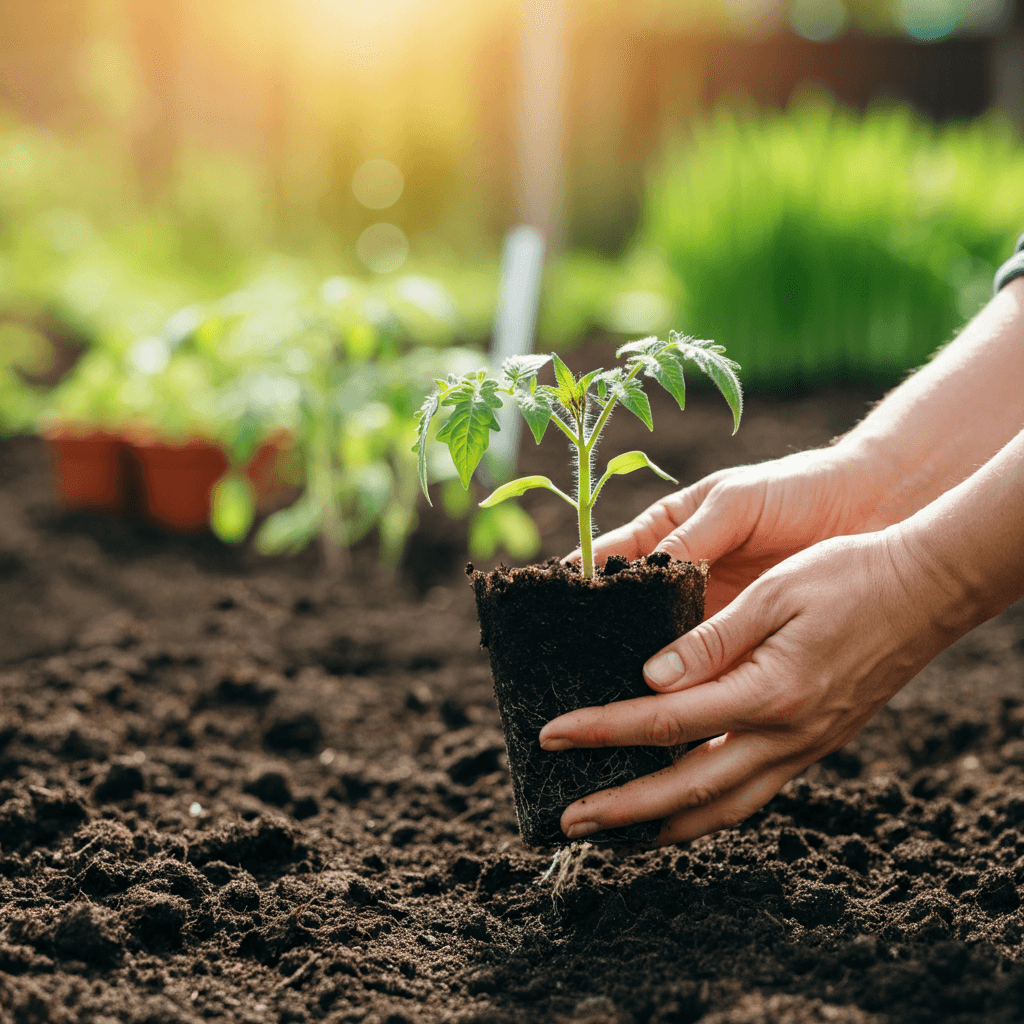
The key to successful transplanting is gentle handling. Damage to roots or stems can severely affect plant growth.
- Check Root Readiness: Ensure roots fill the container but aren’t growing into a dense node, which could cause tangling.
- Loosen the Root Ball: Slightly loosen the roots by gently pressing the base of the plug. Avoid outright tearing them apart.
- Support the Stem: Always hold the plug by its leaves, never the fragile stem.
Plant at the Ideal Depth
Planting vegetable plugs deeper into the soil offers them better start.
- Correct Depth: Position plugs so the top sits just below garden soil level. For tomatoes, plant deeper, as stems can develop into roots.
- Fill Soil Carefully: Gently fill and press soil around the base to ensure stability without compacting the soil.
Water Thoroughly
Water management is crucial in minimizing transplant shock.
- Saturate Pre and Post: Water both the rootball and the garden bed before planting. Immediately follow up with post-plant watering to settle roots.
- Boost with Nutrients: A nutrient-rich solution, like one made with fish emulsion, can energize the seedlings during this critical period.
Provide Support and Watch Them Thrive
Once planted, your job doesn’t end there.
- Stake Tall Plants: Support plants like tomatoes or peppers by staking them early to prevent breakage.
- Weed Often: Keep weeds at bay to ensure your seedlings don’t compete for nutrients and water.
- Observe Growth: Check daily for signs of stress, pests, or improper watering.
Common Mistakes to Watch Out For
To ensure a smooth process, avoid these common pitfalls when transplanting vegetable plugs.
- Overhandling Roots: Tugging too hard on fragile roots can lead to damage.
- Skipping Hardening Off: Sudden exposure to outdoor conditions can shock and weaken your plugs.
- Overwatering: While soil moisture is crucial, saturated soil leads to root rot and stunted growth.
- Ignoring Sunlight Needs: Even after transplanting, ensure your seedlings have access to direct sunlight for optimum growth.
Why Timing is Everything
Transplanting at the right time is crucial for successful plant growth. Aim to transplant your vegetable plugs on overcast days or in the late afternoon when temperatures are cooler to reduce stress. Additionally, planting after the last frost date in your region is critical for frost-sensitive plants like tomatoes, peppers, and cucumbers.
Take Your Organic Gardening to the Next Level
Transplanting vegetable plugs is an essential skill for any gardener aiming to improve their yield and grow successfully. Whether it’s reducing root disturbance, perfecting hardening-off techniques, or ensuring soil moisture, each step builds toward healthy plants and bountiful harvests.
Want to become the master of your vegetable garden Check out our top-rated organic gardening tips and products to support your plant care needs. Whether you’re new to organic gardening or looking to level up, every step of the way can yield big results.


Appreciate it for this post, I am a big big fan of this internet site would like to continue updated.